Banana Bread

image
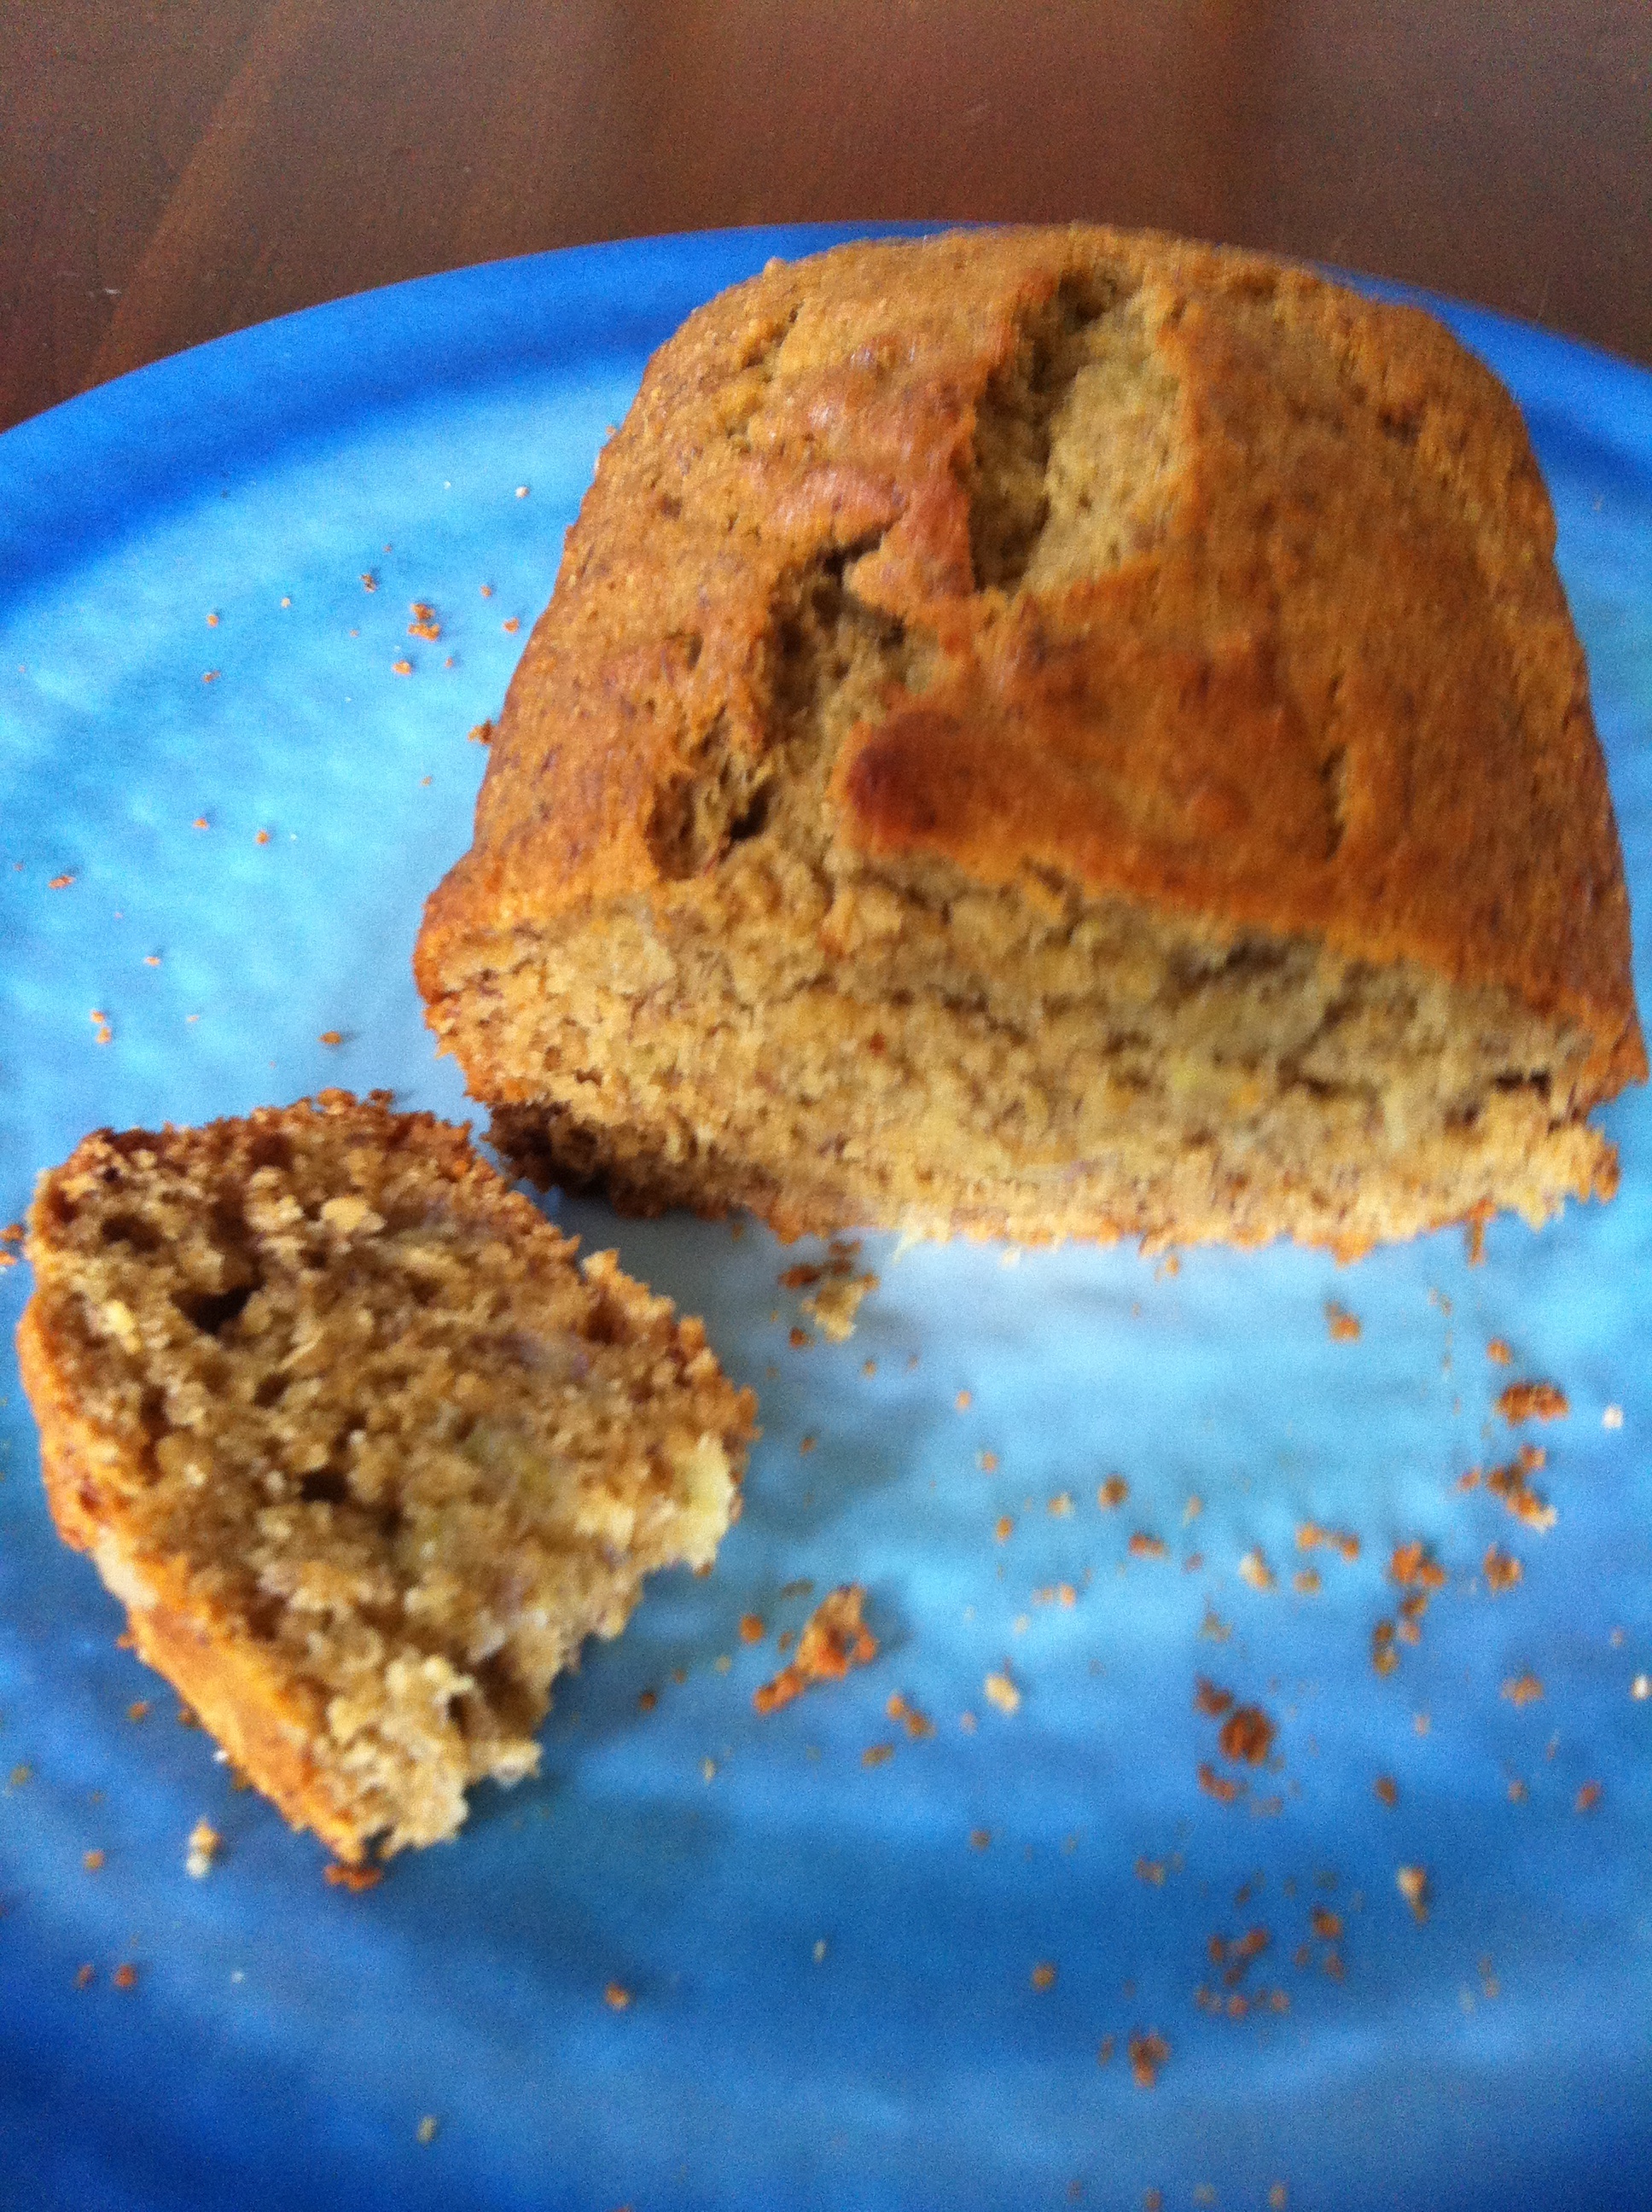
Banana bread is soooooo good in the morning ….. or midday ……. or afternoon, well anytime! It’s tasty and sweet and filling. I usually pick up bananas every time I go shopping at Costco because they are such a good value, and since there are only three of us in the house the dilemma becomes what to do with the over ripe bananas no one wants to eat. Well, they do not ever go to waste at our house! I peel them, bag them and freeze them for smoothies. Or I make Nanner Pudding. Our dogs love them. But my favorite recipe for over ripe bananas is Banana Bread! It’s even better after it has been refrigerated! I can’t get enough. Here is the recipe:

2 Cups All-Purpose Flour (I used 1 Cup All-Purpose & 1 Cup Soft White Whole Wheat I milled myself – but that’s an entirely different blog post!)
1 1/2 teaspoons Baking Powder
1/2 teaspoon Baking Soda
1/2 teaspoon Cinnamon
1/4 teaspoon Salt
2 Beaten Eggs
3 – 5 Mashed Ripe Bananas
3/4 Cup Raw Unfiltered Honey or 3/4 Cup Sugar
1 teaspoon Vanilla
1/2 Cup Oil or Melted Butter (I use extra virgin olive oil)
Optional: 1/4 Cup Chopped Nuts
350* Oven

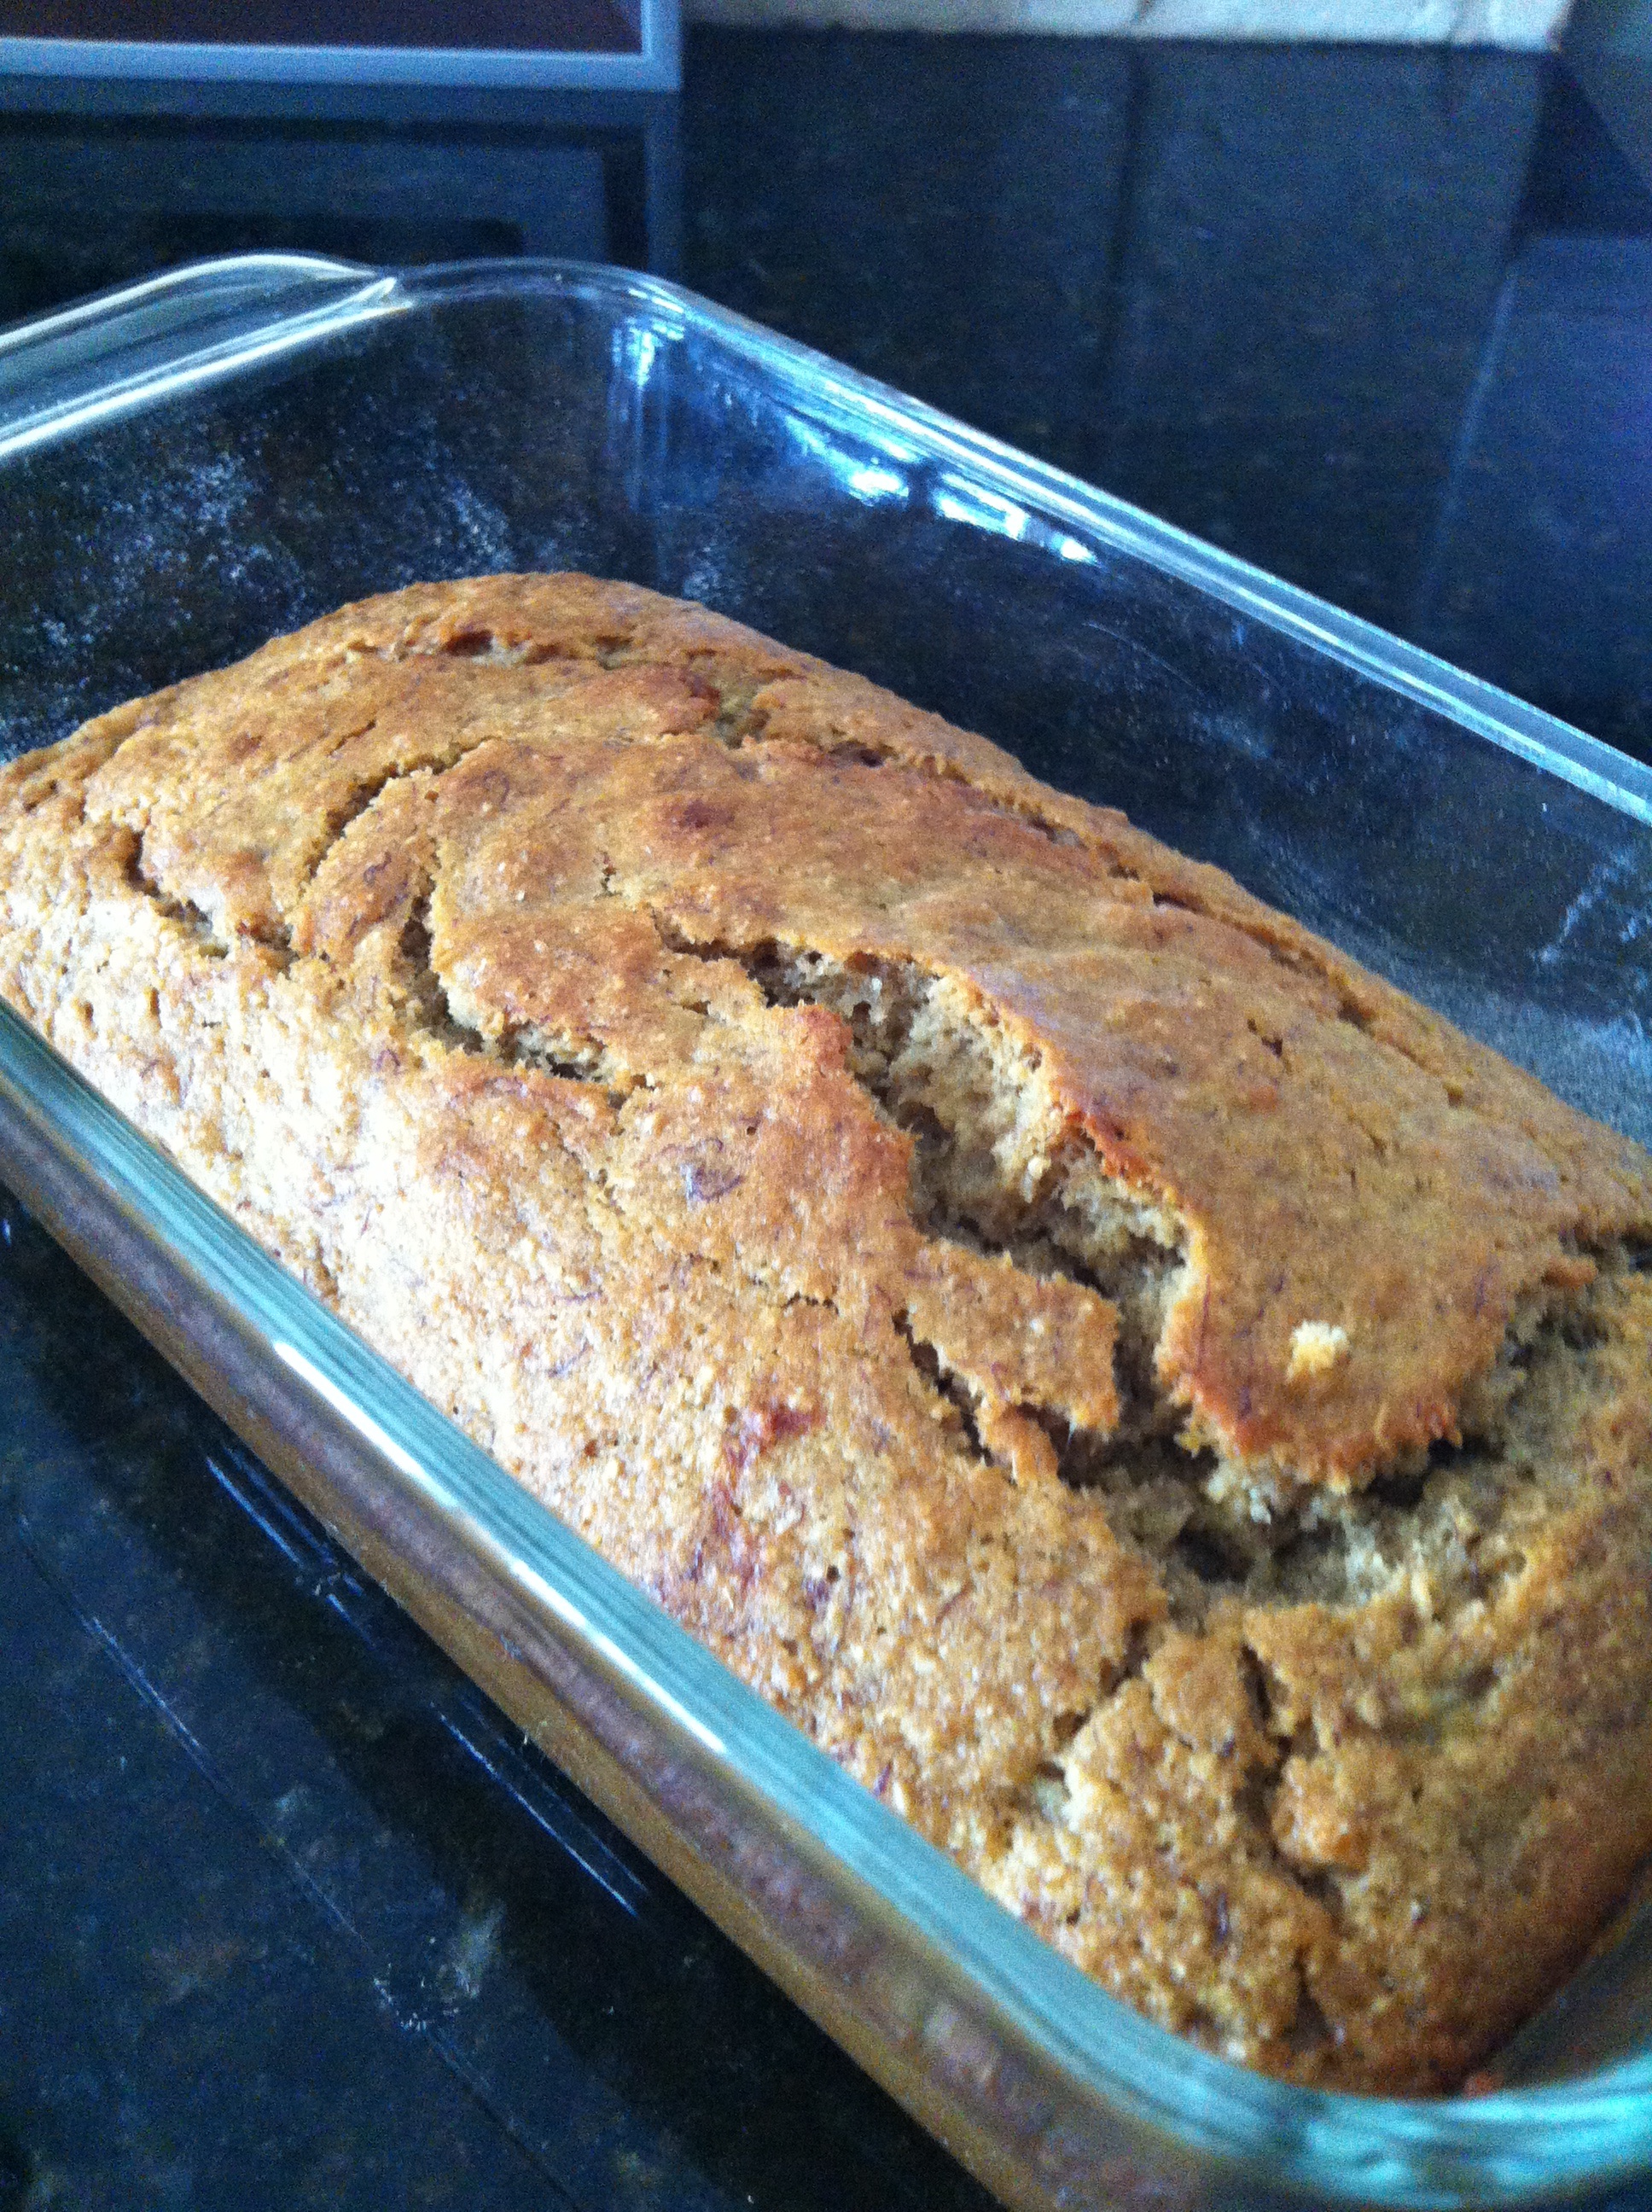
Preheat the oven. Grease & lightly flour two 7 1/2 x 3 1/2 x 2 inch loaf pans. In a bowl combine the flour, baking powder, baking soda, cinnamon, salt and set aside. In another bowl mix the beaten eggs, mashed bananas, honey, vanilla and oil. Combine the two and stir until moistened and lumpy. This is the time to fold in the nuts – I don’t because I am the only one in the house that likes them in bread :-(. Bake until you can insert a toothpick and it comes out clean – about 50 minutes. Once it is cooled I like to refrigerate mine. And it taste soooooooo verrrrrry goooooood!!!
image
Let me know if you try it. Or if you have a better recipe, I would love to try yours!

Rosa

Chicken Pie

One of my favorite recipes is Chicken Pie! This is not to be confused with Chicken Pot Pie, because my chicken does not come from a pot. Yours certainly can, but mine comes from the rotisserie chicken section at Costco. 😉 You see one of my husband’s favorite meals is rotisserie chicken with mash potatoes, gravy, peas and biscuits. So then the next day I use the left over chicken and peas for Chicken Pie. Here is the recipe:

Left Over Chicken from a Rotisserie Chicken
2 Refrigerated Pie Crust (usually 2 come in a box)
2/3 C Heavy Cream
1 3/4 C Chicken Broth
1/4 C Carrots Chopped into Bite Size Pieces
1 Potato Cooked & Cut into Little Squares
1/4 C Peas
1/3 C Chopped White Onion
1/3 C Flour
1/3 C Butter
1/2 t Salt
1/4 t Pepper
1/2 t Garlic Powder
1 Egg Beaten
425* Oven

In a pie dish lay out the bottom sheet of pie crust, put aluminum foil in it and line with dry beans or pie beads to keep the bottom crust from rising. Place in a heated oven for a few minutes until it starts to turn light brown (do not leave in too long because it is going in the oven again once you fill it).
IMG_2413
In a deep pan over medium heat melt butter & cook onion until translucent. Stir in flour & cook until smooth (using a small whisk works well). Add salt, pepper, garlic powder, heavy cream & chicken broth. Stir until combined. Then add peas, cooked potato, carrots & chicken.
IMG_2409
Pour this mixture into the pie crust & cover with the second pie crust. Cut slits into the top of the crust to allow for vapor. Baste the top of the pie crust with egg so that it gets a nice brown color while cooking.
IMG_2418
Cook in your oven’s top shelf for about 35 minutes.
IMG_2421
**Tip: Cover a cookie sheet with foil and place on the oven’s second shelf to catch any drippings – makes it easier for clean up.

This pie is a hit at our house. Hope you try it. Enjoy!

Rosa

Homemade Laundry Soap

So I already told you how I love doing laundry. Even when I visit my sister I will take the opportunity to do some of her laundry. She does not share the love of laundry that I do, but she cooks dinner daily – maybe that’s the trade off. Anyway in the spring of 2011, I decided I was going to make laundry soap. I already used fragrance free laundry detergent so I looked for recipes online and found a few for liquid laundry soap. There are many recipes for both liquid and powder laundry soap; I have just always preferred the liquid kind. I made a two gallon batch my first time for pennies and have never looked back. I love the stuff. I have turned my sister, as well as, several friends on to homemade laundry soap! I have yet to meet someone who hasn’t tried it that hasn’t converted. The recipe produces few suds so I use it in my HE washer. If you have an HE washer and are worried about using the homemade soap in your washer go online and do the research so that you can make the decision for yourself. Here is what you need to make 2 gallons of liquid laundry soap:

1/3 Bar Fells Natha Soap Grated (you can use Zote Soap or other types, but in my opinion Fells Natha works the best and the bar can also be used by itself as a stain remover/treatment before laundering)
1/2 Cup Borax
1/2 Cup Arm & Hammer Washing Soda
2 Gallons Water
Optional: a few drops of Essential Oil if you would like a scent
image
Place about 1/2 gallon of water in a pot on the stove and add the 1/3 bar of grated soap. I use a cuisinart to grate the soap in thirds, and I store it in plastic baggies. For my first couple of batches I used a manual grater and after adding some knuckle skin to my batch, I decided that my recipe did not need the skin off my fingers to be effective. Here is a picture of my son grating:
image
Stir the mixture until the soap is melted. Then add the Borax and washing soda. Both the Borax and washing soda tend to harden in their boxes making it difficult to scoop out. To avoid this, I pour each into gallon size freezer bags that I can pound with my measuring spoon when I want to scoop some. This tip makes measuring the powders much easier. Make sure all is combined before removing from heat. Pour the mixture into a bucket along with the rest of the 2 gallons of water and let cool. I usually let it sit over night. You will have to stir the mixture before each use or pour into your old laundry detergent containers and just give it a good shake before using. The best way to describe the consistency of the soap is that it is like egg drop soup. Since your homemade laundry soap does not contain any chemicals to make the mixture congeal you will have this consistency. I keep mine in a bucket with a lid next to the washer, and I keep a plastic mixing cup in the bucket. You only need 1/2 cup per load. Your 2 gallon mixture will make about 64 loads.

Both my grocery store and Walmart carry all the items needed to make the laundry soap.

Let me know if you too are a homemade laundry soap convert!

Rosa

I Love Doing Laundry

Boy, does that sound obnoxious! But I do love to do our laundry. I find it therapeutic. Odd, I know.

I typically do two loads of laundry a day. And I refrain myself because I could do more. I usually throw a load in first thing in the morning and will have 2 loads washed by 8am. And I hang most all of our laundry to dry.

I quit using the dryer for every load about 6 years ago. It started because I didn’t want to put jeans in the dryer because who needs tighter denim? Little else makes you feel fatter than a tight pair of jeans. And then I purchase some nice pants that I did not want worn down in the dryer. That was followed by some nice shirts. And then ……. do you see the progression here? It was all working so well that I figured I could save some money on our electric bill if I harnessed an alternative energy source. You see, I live in Florida, a.k.a. The Sunshine State, a few items on hangers, a drying rack and a dollar store package of wooden clothes pins do the job. I do not have a line in my backyard, but I do place pants on the chairs on our deck. imageThis all works marvelously! On a hot day it all dries within a couple of hours. If I do laundry later in the day or if it is rainy, I place the items in our family room and between the ceiling fan and the a/c it works for me. In six years I have only had to rewash laundry twice because it got rained on.
image
The beauty of hanging your items up to dry is that you do not get as many wrinkles, your shirts are already hung and ready to get put away, and everything else folds up quickly instead of a big hot chewed-up mess coming out of the dryer.

I love doing laundry so much that I have even resorted to making my own detergent and finding alternatives to commercial stain removers! I’ll save both of those for another post. Ahhhh – I think I’ll go do some more laundry!

How about you? Any other laundry lovers out there? Or does everyone else loath the task? I would love to hear from you.

Rosa

Stuffed Shells

I love easy menu options and tonight’s dinner fit the bill. I made stuffed shells. Between prep and cooking the entire meal was made in under an hour. A quick dinner preparation was exactly what I needed tonight after running around all day! Among other things we had a homeschool coop this afternoon, so dinner prep time was very limited. Here is the recipe:

1 Box (12 ounces) of Pasta Shells
32 oz Ricotta Cheese
2 Eggs, Beaten
1 tsp Parsley
2 tsp Italian Seasoning
1/4 tsp Garlic Powder
1/4 tsp Onion Powder
1 to 1 1/2 Jars Pasta Sauce (I used Bertolli Olive Oil & Garlic but use your favorite. You can make it with just one jar; we like extra sauce.)
1 cup Shredded Mozzarella Cheese
1/2 cup Shredded Parmesan Cheese

20130121-221301.jpg
Preheat the oven to 350 degrees. Cook the pasta as per box directions. Mix the beaten eggs with the ricotta cheese and all the seasonings. I did not add any extra salt to my recipe, because I figured there was enough salt in the rest of the ingredients. Stuff the cooked shells with the cheese mixture and arrange in a 9×13 inch oven safe dish. Pour desired amount of sauce over the stuffed shells. Sprinkle Mozzarella and Parmesan cheeses over top and place in preheated oven for about 35 minutes. Remember to let the dish cool for about 10 minutes before serving so that it does not fall apart on you as you try to serve it.

20130121-221419.jpg
I served the stuffed shells with a salad and garlic bread. It was delicious!

Rosa

I Struggle Making Dinner

I do. There it is. I struggle. It’s not that I don’t like to cook; I really enjoy making a nice meal for my family. And God knows that I love to bake:

20130116-200858.jpg
I have never understood people who don’t like desserts, but that’s altogether an entirely different post. It is just that – I struggle. I like to eat out. Example dinner tonight:

20130116-202742.jpg

20130116-202616.jpg

Think about it: you are seated, choose what you want, it is brought to you while you enjoy conversation with people at your table, your drink is refilled and your food is brought to you without any effort on your part. When you are done someone picks up the table, boxes the leftovers, and does the dishes. Who doesn’t like that? Unfortunately, this habit is expensive and restaurant calories are usually much higher than homemade meals.

Maybe I need a schedule. I do a much better job of cooking dinners when I plan our meals in advance. It seems like such a chore to me. I’ve seen so many lovely blogs where ladies plan their weekly and monthly menus and actually stick to their plan. I do good for a week or so and then I get tired. How do you keep from getting tired or bored or just sick of cooking? Maybe I am missing the daily cooking gene. Most admirable, I think, are those who can whip up an entire meal without much thought or planning – every night!

You know what I don’t mind – laundry. I can do laundry everyday! Or even cleaning! Toilets – No Problem! But cooking, now that’s a chore!

I am going to resolve to do better. Honestly, not because I really want to cook more (hey, I said I was being honest), but because I want to save on the budget. All that extra laziness missing the daily cooking gene is taking a toll on the wallet. So I am going to take a stab at it. Any suggestions or recipes for me? They will all be much appreciated.

Rosa